DIY Fabric Rope Baskets and Bowls
Hi Friends,
We're back again this week with another DIY as promised. Last week we made Fabric Beads, and this week we're going to make Fabric Rope Baskets. This is another craft you can do with your children. If they're doing remote learning, they're probably tired of staring at their screens, so here is something fun you can do together. It does not require any sewing, just a hot glue gun.
The most time consuming part of this DIY is wrapping the fabric around the rope. This is easy enough for younger children to help with and then you may wish to take over when it's time to pull out the hot glue gun. Older kids can do this project start to finish and its such a cool thing to display! I've seen these coiled baskets at craft fairs and farmers markets for years and I'm so excited to finally make my own.

You will need:
- Clothesline
- You can find this at most hardware stores. The plastic ones will not work for this, look for cotton or polyester. 50 feet is a common length- it's enough to make many small bowls, a couple medium sized baskets, or a large basket.
- Fabric
- Cotton is the best choice, check out some of my Cotton Batik!
- Glue stick
- Hot glue gun
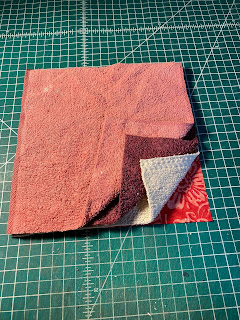
1. Cut your fabric into long strips about 1/2" to 3/4" wide. You can free-hand the strips, just make sure they aren't too wide or too narrow. I used scraps of my Cotton Batik. I had a long strip of it and I just started the cut and then tore it for the raw edge. If you like clean edges, use a rotary cutter. Cotton is the best choice for this because it won't fray like linen or rayon would.
2. Place about an inch of the end of the clothesline onto the end of your fabric strip. Make sure the right side is on the outside. Glue the fabric around the rope end, as shown, using the glue stick. This is the only time you'll need the glue stick.

3. Fold the now-glued end over the fabric and begin wrapping, keeping the fabric taut and hiding the folds as much as possible. Children will likely need help with this step, but the wrapping from this point forward will be a breeze.


4. Continue wrapping with a little bit of overlap. The amount of overlap depends on the width of the fabric strips, just avoid allowing folds to form as these tend to stick out. I attached a paperclip to the end of my rope so that I could easily hold the end between my knees and wrap towards me. It gets easier to wrap after the first foot or so.

5. When you're at the end of your strip, add another one by tucking it into the last inch of the first one. This is a good time to add a second color or pattern if you like! The one I'm demoing is only one color, but the multicolored baskets and bowls look amazing. If you're using a fabric with a print, choose a smaller print because the large prints don't show up as well.

6. Once you've wrapped as much rope as you like, you can cut it and wrap the fabric to conceal the end. Just pull the fabric around and tuck it in. If it doesn't want to stay in place you can use that glue stick again.
7. Heat up your glue gun and get ready to coil!
8. Start by tucking the end in tight--you'll use a lot of hot glue for the beginning of the coil. Make sure you keep it tight and flat (otherwise it won't sit right).

9. Continue coiling the flat disc until you reach a desired size for the base. I chose to make mine small because I'm going to use it to hold some of my loose jewelry. When you're ready to start winding vertically, place the glue more inwards as shown and gradually coil inwards. I glued mine so that the walls of the basket would be vertical, but you can make yours more wide and open if you prefer. This DIY is very customizable!

10. When you reach the end, try to flatten the end of the rope out and really glue it down. Now that it's finished, feel free to pick off any strings of hot glue you see hanging out and trim up any loose threads.


Comments
Post a Comment