Whether you're someone who is just starting to learn to quilt, or if you are an expert and you have tons of fabric scraps lying around, this is a great pattern for you! It's fairly straightforward and very customizable. I have listed the measurements below, but you could easily change the size if you would like. Another great thing about this potholder is that you can use recycled materials for the batting and fabric scraps for the strips and bias edge. And so I present to you the (eco-friendly) Sew-As-You-Go Potholder, which can also be used as a trivet!
You will need:
1/2 yard of fabric for bias edge, or a 22" x 1.25" bias strip
9" x 9" backing
2 old fluffy towels, or 3 thin towels, or batting - this is a great opportunity to up-cycle your old towels, they make great batting for this potholder!
9" x 1.5" strips of fabric of your choosing - fabric scraps work great for this!
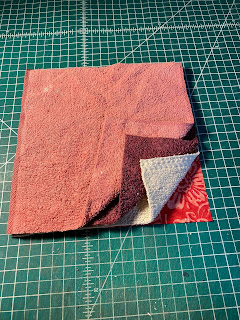
Lay out your backing and batting layers as shown below. I used 3 old towels for my batting.
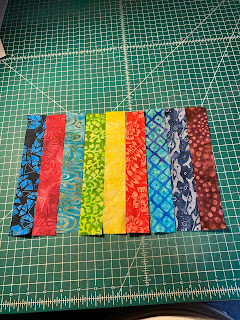
You can also lay out your fabric strips if you want them arranged a certain way, as I've shown here.
Lay the first strip right side up on the left side of the layers of backing and batting.
Lay the next strip on top of the first strip with the right sides facing each other.
Pin the strips in place and sew using 1/4" seams on the left side of the stacked strips. Fold out the second strip after sewing.
Repeat the process for each additional strip, and make sure to keep track of your right sides!
Once you've finished sewing all of your strips together on the batting and backing layers, use a 7-8" circle (or plate) and mark around it with a gel pen or chalk. Your batting and strips might shift, so be sure to get all layers under the plate.
Sew potholder on your marking.
Cut along your sewn line putting a 1/4" bias on the edge.
With right sides together, pin the binding fabric to the edge of the back of the potholder. Put pins in at about 1.5" from the start and end of the binding. Using 1/4" seam allowance, sew around to each pin. You'll have extra length of the binding fabric at the ends, as shown.
Fold each open binding ends, so they butt up against each other and press.
Take the first binding edge and cut at 1/4" from the edge. Take the other binding edge and cut on the pressed edge.
Fold the potholder in half with the front on the outside and then fold the edges back on itself. Your potholder is going to look a little bit like a hotdog bun. I used clothespins to hold the folds in place.
While the potholder is folded, take the two ends of the binding and pin together. Sew at 1/4".
Press seam out. Sew the remainder of the binding edge.
Turn the binding over the edge to the front of the potholder. Turn the edge in 1/4". Sew around the binding, close to the inside edge...
...and voila! You now have a beautiful quilted batik potholder!
If you make this potholder, please send us pictures! We'd love to see your creations :) You can message us on Facebook, Instagram, or send us an email at info@indobatiks.com.
Happy Sewing!


Comments
Post a Comment