New and Easier Way to Make Eco-Friendly Foodwrap
Hi Friends,


Some time ago we posted a DIY blog for Eco-Friendly Foodwrap and since then we've refined our methods and we'd like to share them with you! Here we have an updated DIY for Eco-Friendly Foodwrap. We have two great tried-and-tested recipes: one for Vegan Foodwrap, and one for Beeswax Foodwrap. If you are not Vegan, I have found that the Beeswax Foodwrap works best.
For this new method you will need:
- Fabric of your choosing, cut to the size you would like.
- To be sure that these remain all-natural, you should use 100% Cotton fabrics. The fun part of making your own Eco-Friendly Foodwrap is that you can make it exactly how you would like it! Some of my favorite fabrics to use are found on my website: Cotton Batik Fabric
- Beeswax -OR- Candelilla Wax (Vegan)
- Beeswax can often be sourced locally. I found mine at the farmers market, you may need to grate this yourself. You can also find it on Amazon in pellet or flake form here: Organic Beeswax. Candelilla wax is a Vegan, plant based, alternative. You can find it at some craft stores and on Amazon: Candelilla Vegan Wax Flakes
- Jojoba Oil
- Pine Resin
- This can also be found on Amazon (I know we've all been doing a lot of online shopping lately): Pine Resin
- A non-stick sheet for ironing: I used Dritz 18"x18" non-stick pressing sheets, but you could also use parchment paper or some other heat-proof sheet.
This method is so much easier and much less messy than our last one! And just like our last method, if you feel like your Eco-Friendly Foodwrap is starting to get worn or is losing some of its waxy quality, you can repeat the ironing step and redistribute the wax and it will be just like new again. This Foodwrap has so much life in it!
The quantities are not going to be exact because everyone will want to use a different size of fabric for their Foodwrap. Be careful not to use so much that it oozes out, but a little extra is good. The leftover wax in the sheets can be used for the next piece of Foodwrap.
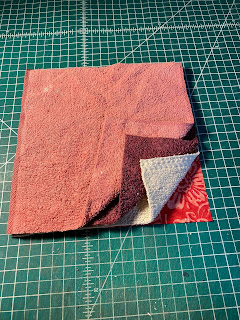
1. Gather your materials and place a piece of cloth or an old towel over your ironing surface. You may wish to protect your ironing board or working surface from spills. My workspace is shown below.

2. Mark the outside of your pressing sheet with "outside", this will help you when you make additional Foodwrap. I wrote mine in the corner. The messy wax covered sides face inward so that I don't get wax all over my iron next time.

3. Place your cut piece of fabric between the sheets and sprinkle your wax and pine resin over the top. Use half the amount of pine resin as wax. I use about 1/2 cup of wax (Beeswax or Candelilla) and 1/4 cup of pine resin. Drizzle a small amount of jojoba oil over the top. You don't need much jojoba oil, but if your Foodwrap comes out too brittle, add more jojoba and re-iron it. Place the sheet back over the fabric and iron on high (cotton setting) until the wax is melted and evenly distributed.

4. Peel back the pressing sheet and allow the wax to dry. I like to hang mine as shown below.

It may take you a few tries to perfect the amount for your specific size of Foodwrap, but don't be discouraged! You can make small adjustments and re-iron as desired. You'll be a pro in no time! Comment or email if you have any questions about the process, we are happy to help.

Comments
Post a Comment