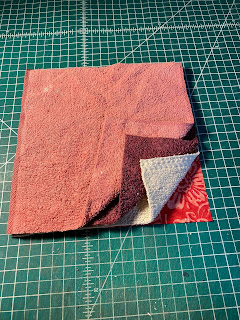
PopOver Potholder
As many of you are finishing up with the holiday season, like me, you might be down a few potholders. A friend had this very useful and not your ordinary potholder pattern. Introducing the PopOver Potholder. It has many uses, including under hot coffee or soup in the microwave as well as folding nicely for taking cookies out of the oven, or taking pots off of the stove. Instructions for making your own are shown below.
|
|
FABRIC REQUIREMENTS:
1/3 yard of fabric (makes 2 potholders)
2- 10” Squares of
Thinsulate Batting
This product is for heat, but it cannot go in the microwave.
-or-
Wrap and Zap by Pellon
This product can go in the microwave.
Making the pattern pieces
Step 1: Using 2 legal size 11.5” X 17” papers, fold each separately in half lengthwise then again crosswise.
Step 2: From corner fold, measure up 4 ¾ “and mark with pencil. Do the same for the other folded edge. (on both pieces of paper)
Step 3: Using ruler, make a straight line out from your mark so that the 2 line intersect. (on each piece of paper)
Step 4: On the edge where the lines intersect, using a cup, mark a line so that the line is now a curve.
Step 5: With each pattern piece, measure out ½” from your marked edge. Also measure down from marked edge 2 ¼” towards the fold. Mark the spots.
|
|
Step 7: Unfold the paper
Step 8: On one Pattern piece, cut out the darts- this is the Batting Pattern piece. The other one is the Fabric Pattern, mark the dart lines on these.
Cutting Instructions
Step 1: Depending on which type of batting you are using, cut two or three layers for the Batting Pattern
Step 2: Cut 2 pieces of fabric for the Fabric Pattern.
Sewing Instructions
Step 1: Start with the Batting pieces, with each layer, using a wide zig-zag stitch sew darts together.
Step 2: With the Fabric pieces, stitch the darts
Step 3: Pin Batting layers on the wrong side of one of the Fabric pieces. Stay- stitch close to edge.
Step 4: With right sides together, sew fabric pieces together- leaving an opening for turning. Turn out to right sides. Hand sew opening.
Step 5: Finish with any preferred stitching design.


Comments
Post a Comment